Showing posts with label machine quilting patterns. Show all posts

Flipping Patterns Around

No doubt you love that you won't ever have to be perfect. And, you value the idea of how easy and quick design layouts would be.

Have you been mixing and matching your Terry Twist Stencils and Template sizes? 


Look what they can do... :)


If you like these patterns and have a computerized quilting machine these patterns are being digitized and will be available soon. Please check with intelligentquilting.com/sallyterry


To checkout the tools and ideas click here

Look for the new 125+ page Terry Twist Pattern Handbook coming soon.

                                                    
Terry Twist (R) is a Registered Trademark of Sally Terry(R) LLC Brand Products, All Rights Reserved and Actionable.

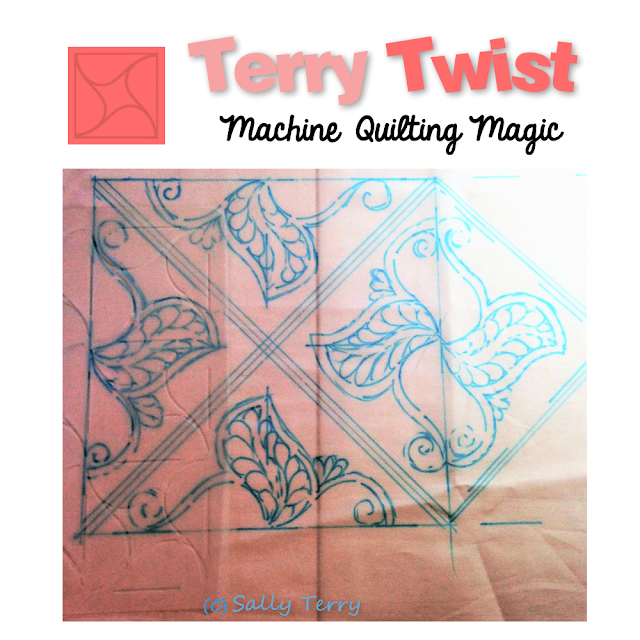
Another Block Design with the Terry Twist just messing around

 Check out both the Terry Twist Stencil and Ruler Sets

If you have the stencils this is the 9" 9-Patch Square using its' 3" Terry Twist Pattern Design. It is also easy to create using the Template Rulers since you have it in the 3".

I laid it out on the edges of the block and then continued it on the other side of the seam, just for fun :) to see what it would look like. 

Interesting pattern on point with a few machine quilting free motion feathers thrown in.

Since it is asymmetrical it is very forgiving indeed. 


Hope you try it.

New Free Motion Feather Machine Quilting Class is LIVE

Sometimes the timing is just right...

Here is a new class to help SPRING your creativity !!!

Have been quiet for a while filming over 90 videos and 300 minutes of Free Motion Feathering Freedom and creative inspiration.

The goal was for all levels of machine quilters to be able to make it up "as you go" with free motion friendly feathering designs and patterns for every area of the quilt top. 


If you are wanting to take your feathers to the next level, here is a special discounted coupon for you to use. The discount is in the link under the image below and you will be taken to the course page where you can enroll.

As with all my Udemy courses, there is a 30 Day Money Back Guarantee if it does not meet your expectations.


https://www.udemy.com/machine-quilting-free-motion-freedom-feather-designs/?couponCode=feathermebeautiful20

Quilt That Has Been Folded and Stored

Well...many of my sample quilts have been stored for a long long time. They are still looking brand new except for the folds that seem permanent. 

I used a Wrinkle Release product on the folds, saturated the quilt, put weights on the quilt to the side where I did not spray in order to hold the fabric flat and when it dried...no more wrinkles. Try a little corner first.

Also you could simply hang the quilt after spraying the horizontal folds and let the weight of the quilt take out some of the folds. Then turn the quilt 90 degrees and spray again.

Be sure to leave a comment and let me know how it worked for you.


The Holidays are here....this one was quilted with giant 14" pine cones, and diagonal showers of snow flakes, and the most delicate of pieced stars were ditched.

Remember, the simpler the better. To make tops like this easier to quilt instead of feeling like you have to come up with dozens of fill patterns pick 3...then vary the sizes and angles. It will look more uniform and it goes much faster and looks well thought out. 

 __________________________

My gift to you
FREE SHIPPING IN CONTINENTAL US at  http://www.sallyterry.com

Pressing Seams The Right Way Can Give You A Higher Quality of Machine Quilting

Hi, just figured out what to do with the borders.

The borders are 2" finished, so I cut 2 1/2" of fabric.
Dark purple sashings are 1" finished, cut at 1 1/2".

Added the little 2 1/2" x 2 1/2" corner square so it finishes at 2".
If you want to add more do, but wanted to keep this simple.

Single Fabric Quilt 

Pressing Seams Open


This is kinda my pet peeve....when you have such intensely colored fabrics, what color of thread do you use when you stitch-in-the-ditch? (Have resorted to variegated threads for SID...it turned out great, and was a bit unusual, but the casual style of the quilt let me get away with it.)

Now I see why quilters don't stitch-in-the ditch any more!!! There is no thread color that works without making it look strange.

And unless you use monofilament, which is usually not the customer's preferred choice for their quilts then the only solution is to press the sashing seams open and ditch on the low side of the seam in the sashings using a matching thread. Most sashing fabric is a bit plainer and mostly monochromatic so it is easy to blend threads.
remember?
Love it that you don't have to change thread, can do the entire thing at one time, creating a skeleton of stability to the quilt.

Please comment....if you have anymore suggestions or what you do to SID and choosing thread.
Now it is ready for the quilting!!!!

Yours in the love of quilting, Sally

P.S. This tip and more is found in Pathways From Quilt Top To Quilted.
Right now it is 20% OFF here is the link  http://www.bobbintext.net/quilt-top-to-quilted-book.html

Use coupon code books20


Summer Time Machine Quilting and Piecing....Fabulous Combination

 
Red White & Blue Variegated Threads on a Patriotic Quilt my first year as a machine quilter 15 years ago....
Happy Happy Summer Days & Happy 4th of July!!!


If you have been following along with this one fabric quilt it is now time to sew your rows together.
First stitch your blocks together with a sashing between each one without a sashing on the ends of the rows.


Next I laid the randomly assembled rows to see what was most pleasing visually.

Finally measure one assembled row across and cut your first length wise sashing that will connect the rows.
Cut enough for top and bottom outside rows.
9 rows of blocks = 10 sashing


With my configuration is goes like this:

4.5" x 5 interior blocks = 22.5 + 4.75" x 2 (9.5" for 2 end blocks ) = 32" + 1" x 6 (sashings) = 38"

TIP: If you press the sashings away toward the blocks, that will make it easy to stitch-in-the-ditch throughout the entire quilt if you choose.

Quilt Happy
Yours in the love of quilting, Sally

to join our Tips, Tricks & Twists newsletter click the link  loaditandgo@getresponse.com

Red Glasses Help Piecers See Value More Clearly


Was at my new friend Lori's recently relocated quilt shop Lolipops in Fernandina Beach with Jean Lowe. Lori's sister Mary was teaching a piecing class and looked up to greet us with these oh so stylish red glasses. RED, red frames and red lenses. I immediately got it.... the red filter for seeing value.

My gosh you could piece with these things and they even come in clip-ons!!!!

So we looked at several scrappy table runners with medium greens and red florals (Christmas In July Theme) and were amazed how the green balanced the red, even tho the green was a bit lighter. I know from photography class in college that red is visually weighted to black. That is why dark rooms are lit with red lights....but green being weighted to black? I also know (being an Iowa Girl) in nature, green fields and grass absorb the sun's rays for photosynthesis and tends to act like black.

hmmmmmmm

Enuff....found the links for you from Keepsake Quilting if you are inclined...

http://www.keepsakequilting.com/productdetail/8509.htm

http://www.keepsakequilting.com/productdetail/8476.htm

If you are following along with our piecing project your dimensions are:
cut 5" blocks - 4 1/2" finished
cut 5" x 1 1/2" sashing- 4 1/2" x 1" finished

Chose a deep eggplant fabric with purple and blue color washes for interest.
This is Glacier Fields designed by Caryl Bryer Fallert and has been in my stash for years....have a feeling it is no longer available but any subtle pattern will do....or solid.


Testing to see if I like it. Yep....let's cut. Amazing how one fabric has this much color contrast. I am sure you will find that as well when you start separating them.


Cutting 1 1/2" strips salvage to salvage then cut into 5" length pieces (5" x 1 1/2" cut - 4 /12" x 1" finished) for sashing between the blocks.


The assembly begins.


Yours in the love of quilting,

join our newsletter at loaditandgo@getresponse.com for specials, fun and machine quilty thoughts from the Quilted Muse


Quilt Along With Me, Found Some Great Fabric

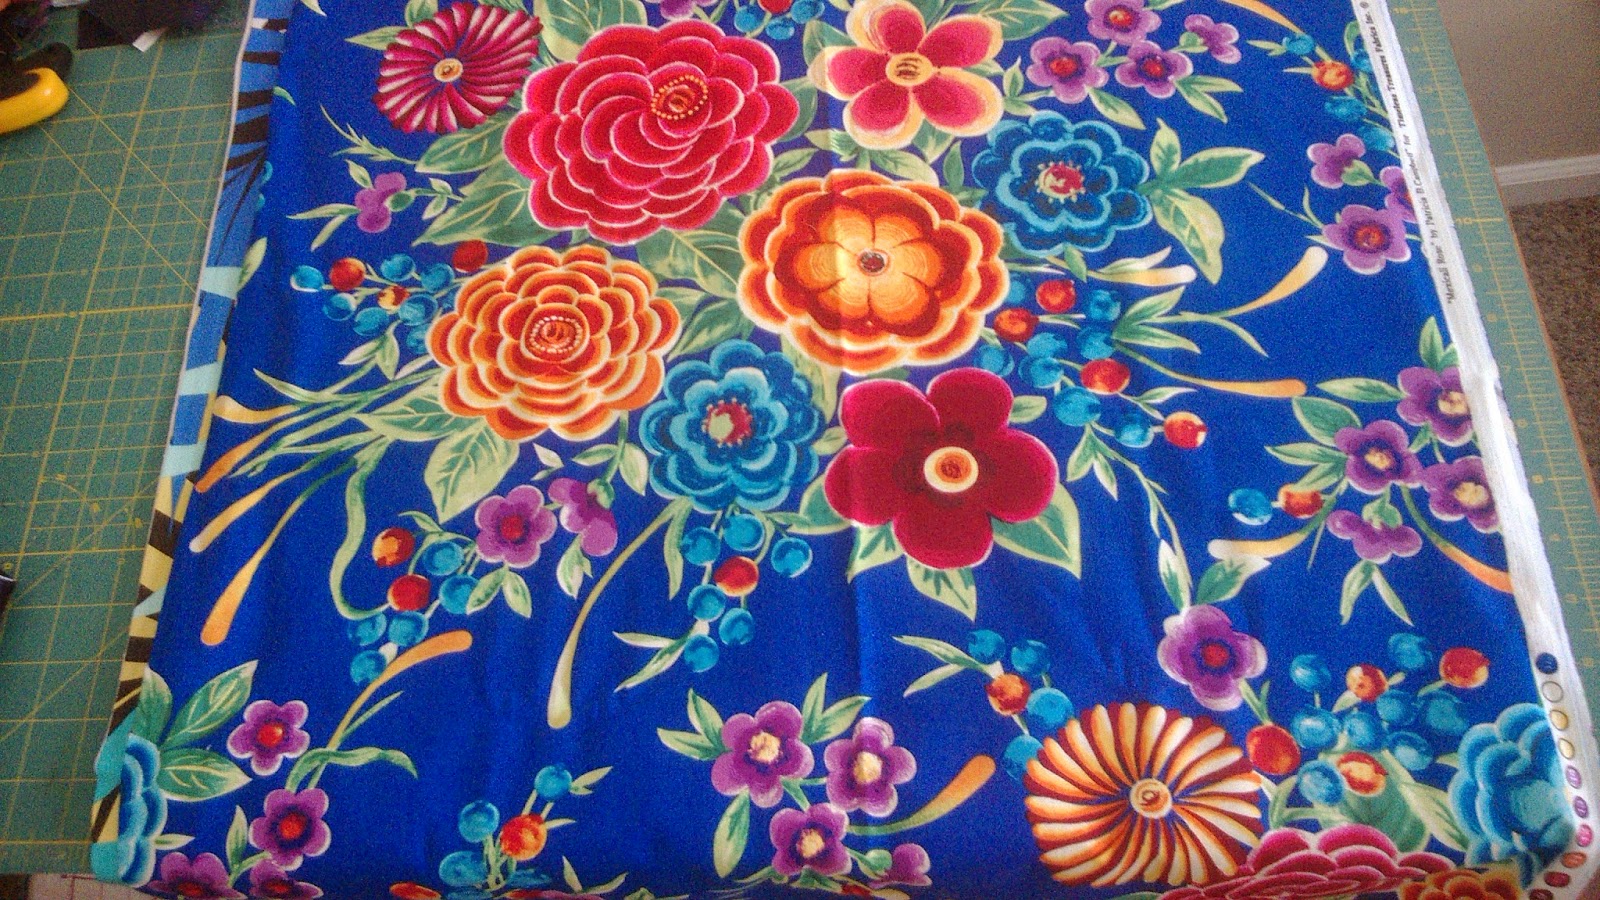
It has been in my stash for a long time. Some fabulous Alexander Henry (bottom photo). Want to create a quilt with me?

Quilt with me all the way through this project including the binding. Just wait until we get to the machine quilting patterns I will share....and that means another finished quilt project.

Go find that fabulous large patterned fabric you don't know what to do with...like these.
Timeless Treasure, Michael Miller and Alexander Henry.

Too patterned for today's Modern Quilt but they will work in a simple block arrangement
Fussy cut the 5" blocks if you need to. I am using a simple block 5" x 5" with a 1" sashing.

Mine will be small: 7 blocks across and 9 blocks down. You can always add more. I am choosing odd numbers because I will be combining 2x2 blocks at a time to machine quilt a single pattern in, and then have 1x2 stacked for another accent pattern.

Don't worry, will publish the pattern, layouts and yardage next time.  

Leave comments and let us know how you are doing.

Yours in the love of quilting,  Sally

P.S.
Here is my new work space. So efficient in a small area. Can store, display, iron, cut and it even has a design wall feature. My favorite thing. Check it out here....


Machine Quilting and A Hidden Eye Spy Image

Thought I would hide some fun images while machine quilting like my "Quilter's Hand" signature that goes into every quilt.
It becomes a game with my customers to find it among the feathers in a border or tucked in an open area of a meander pattern. In fact, I stitch it where ever it would fit and don't think a second thing about it not being part of the design. If the quilt is 92" x 78" then that little square inch of design is only 1/7176 of the finished quilt. And if I really mess up on the spacing then there is the perfect little pattern filling up the void.

No doubt you have seen the "quilter's hand" before, maybe in a class sample. It is on page 48 in Pathways To Better Quilting Book. Think about what you could do to tuck a little stylized design into your quilts. Your own design that represents you in thread. Could be a flower, heart, basket, bird, fish, house, star or what ever represents you.

Here is a quilt sample I did for a customer. In looking more closely I found a perfect eye...can you spy it?


Yours in the love of quilting, Sally Terry

We're Celebrating 15 Years of Machine Quilting Instruction at SallyTerry.com

For YOU after 15 Years of Professional Machine Quilting and Instruction we are Celebrating at sallyterry.com. We are so grateful to all our loyal and faithful followers who have been with us for so long. It has been a wonderful 15 years and we are planning even more for you in the next 15 years.

We know you would like to take advantage of the Celebration with 15% off your total purchase. That is over and above the coupon price of some of our products.


Click here to check out the savings now through May 31st.


Machine Quilting Patterns Should Look Good Small, Medium & Large

By now you probably have fallen in love with one special machine quilting pattern or a machine quilting technique that you use over and over again. It is no doubt easy to do, fun to stitch and you love the result, no matter what level of quilting you are.

And, maybe the overall look of your machine quilting may have a similar appearance when hung side by side, no matter what style of quilt top.

That is okay to have a style, in fact, it is important to have a style.

Ponderance....do you remember thinking you could change up your patterns a bit? Yet, you really don't want to take the time to figure it all out.

Here is a simple trick to see if the patterns and techniques you are using will work on many style of quilt tops yet have a distinctive different look when used.

  1. Does it look good small, medium and large without being distorted?
  2. Can the design be easily stitched quickly without re-drafting or marking?
  3. Will it lend itself to adding additional little design elements such as feathers, loops, curls, ribbons or leaves to give it a more detailed and textured feel for more prominent areas?
There are machine quilting patterns that work well in many sizes, and are compatible with your feathering and smaller background fills as well.

So change it up when you feel you are getting a bit bored and want a new look to your machine quilting.


Don't forget to check out http://www.sallyterry.com for more pattern ideas that work like the Terry Twist Pattern System that amazingly looks different when sized differently, and totally forgiving of any "bobbles & wobbles", and loves all the little extras you can add to it.


Happy Quilting, Sally

P.S. All orders at http://www.sallyterry.com are 15% off the total, even off some special coupon offerings too. But, this won't last for long as we celebrate Sally's 15th Years of helping Machine Quilters.


Piano Key Border Machine Quilting Design

Here is a great little idea for piano key borders so that you are ditching the key seams and traveling at the same time. Also, it is recommended that the outer 1/8 th inch of the border is stay stitched to prevent the piecing seam thread from coming loose.

1. First stitch in the perimeter ditch all the way around unless the piano keys are so small that you won't have a pucker at the seam.

You can always go back and stitch the perimeter seam later, whether  the between body and border or sashing and border.

2. Consider machine basting instead of pinning the raw outer edge of the border before starting an area.

3. Pick a great variegated thread for fun.

4. Dash a line parallel to the inner border seam about 1" in. Dash a line parallel to the outer border edge about 1 1/4" in if on raw edge, 1" in if the area is seamed like picture below.


5. Starting at the top stitch-in-the-ditch between two piano keys, starting from the inner border seam stitch to the left (use picture above as reference look at the blue fabric key) all the way to the outer border seam, arc down 1/3rd of the way then stitch to right to the 1" mark and arc down. You are dividing each key into thirds.

6. Next stitch all the way left to the outer border seam again, arc down one more time and stitch-in-the-ditch to the right until you reach the inner border seam and arc down. You have now completed one piano key.

7. Continue to zig-zag back and forth. The inner stitching 1/3rd will alternate 1" from perimeter seams as you travel around the quilt top.

8. For corners you can simply stop or stitch the design on the diagonal out.

Hope this becomes a favorite way to get around piano key borders. For more visit the new sallyterry.com

What If You Find A Photo On The Internet You Want To Use?

Sally has a new website so be sure to check it out! http://www.sallyterry.com

This is always a very confusing subject and one that is hard to define and explain, so here goes...

As many of you know I grew up the daughter of an attorney. And in May my daughter Sarah graduates with her MBA & Law Degree specializing in Intellectual Property (emphasis internet) and she promised she would do a sallyterryLIVE Video call after she passes the bar and answer some of your questions, especially for pattern designers.

So what does this have to do with you? It has to do with your creativity and sharing it with others...because we all share. We are quilters and that is what we do. We live in a visual world and there is no other way to share our ideas than through pictures, videos, and the like.

I found a great blog and they were talking about protecting your creativity on the internet with a wonderful infographic included. This might help clarify the new laws in affect. In case you are curious here is your link: 
http://mymissassist.com/using-blog-post-images-can-you-afford-this/