
Yet we are so into Modern right now, including me, that these old gems may be waiting a long time before we can get them out of the trunks and get them machine quilted.
I think there will be an even bigger resurgence of old quilt tops than there is now. They will become even more popular for professional machine quilter customers. They need need to be finished.
And, they can now be finished quickly, quilted dirty-remember, using either modern machine quilting designs or the traditional feathers and stitching-in-the-ditch like I am here. If you don't want to SID then quilt up to 1/4" away from the piecing lines.
Even some local quilt guild features a section for them in their guild show. My last guild meeting of Country Star Quilters in Hilliard, Florida had a program of an Antique Quilt Turning. Everyone brought their antique quilts and told their story. It was an unbelievably great program. The stories, the memories were heart warming and quite fascinating, especially how far these quilts have traveled.
Plus we cannot let them sit there forever in the dark. Lets get them out in the sunshine!
Here is my current Antique Quilt Top and a few tips on how to load and keep it squared up, since they are mostly hand pieced. The pieces have had their template shape traced on the fabric with pencil and cut by hand with scissors. Imagine. This one was remarkably square.
 |
| 1. Used Channel Locks to baste across in a straight line using the straightest part of the pattern to line up, the melons and basted around the raw edges. |
 |
| 2. Here is how straight it was when I got to the bottom. Notice the ruler tape on the leveling roller to help keep everything straight as I floated this top. |
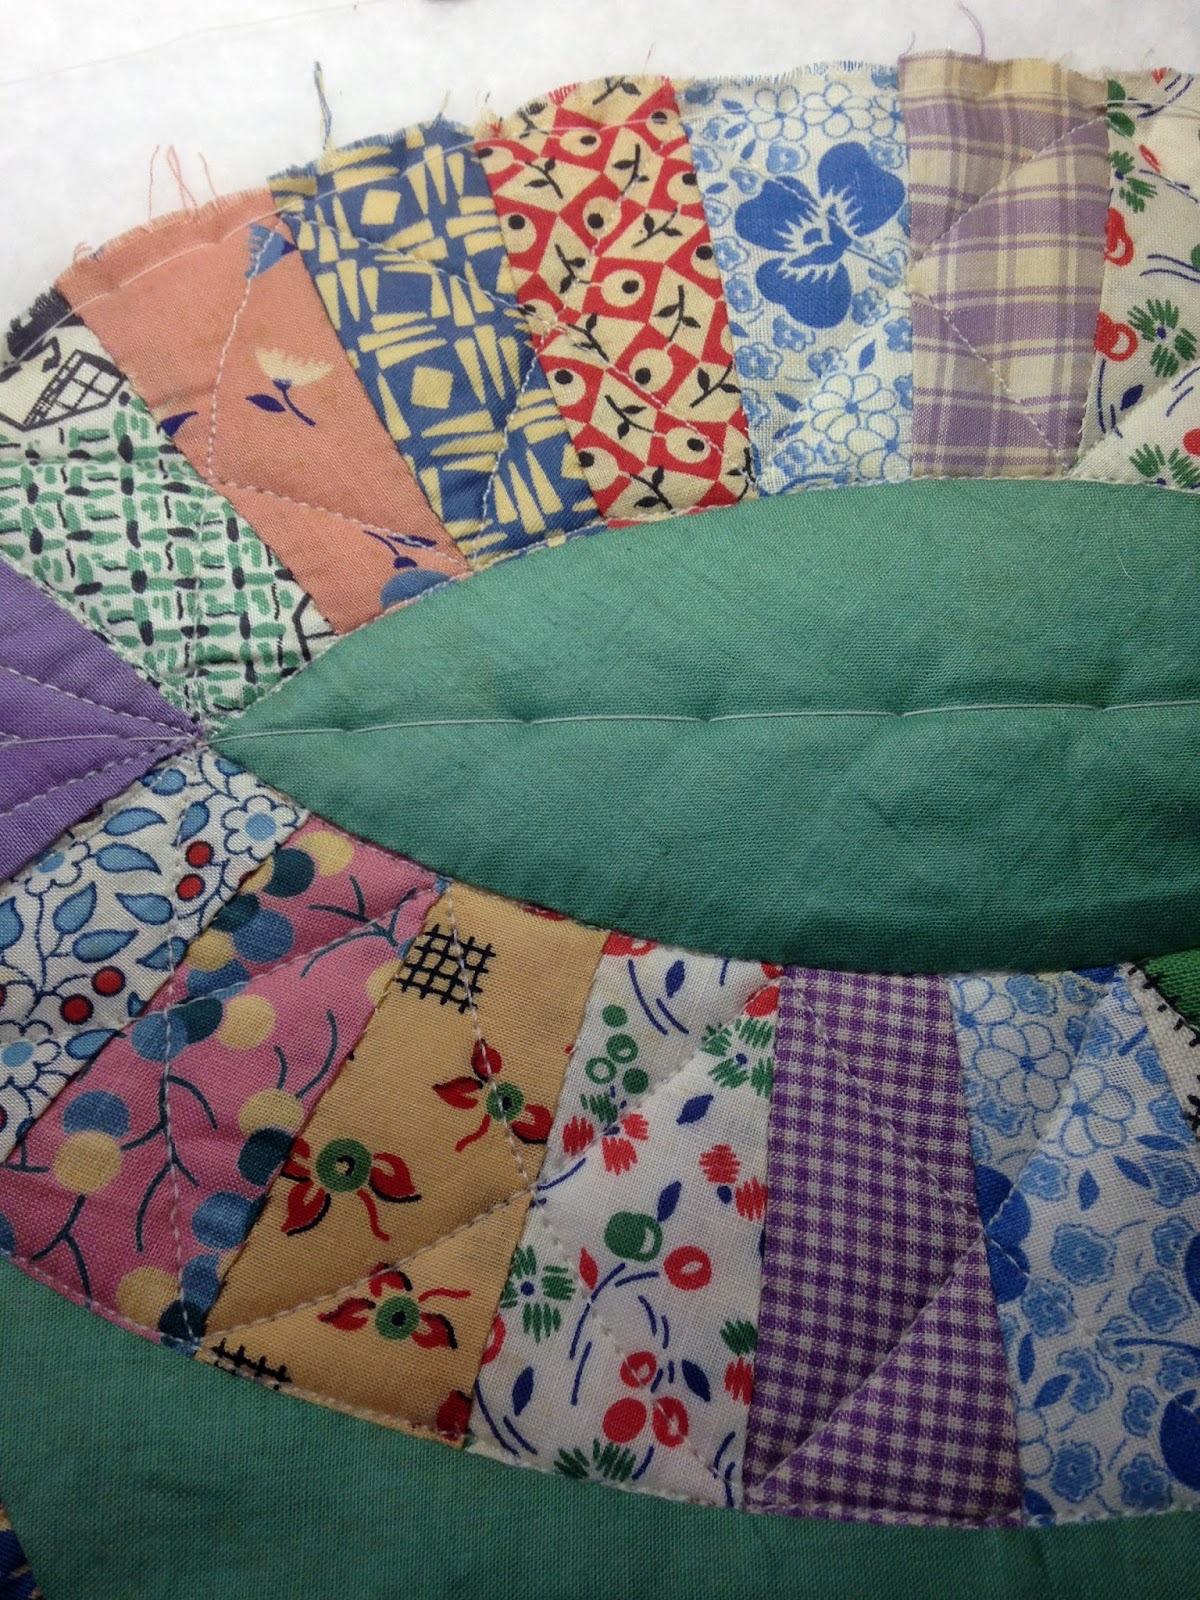 |
| 3. Repeated the curve of the melon in the piecing instead of the usual straight line zig-zag. |
 |
| 4. Here is how the overall design is starting to work out. Ditched on low side as it was pressed to the green. |
 |
5. Used the top roller to line up the bottom of the orangethen based across. Also checked the vertical before basing every row.
|
If you can keep the machine quilting density equal for both thread color changes it will stay squared up as the first basting and then current stitching really stabilizes the top.
Work your way down and keep going in the same direction, right to left here.
This quilt was a full float, which means the bottom of the quilt was never basted and attached to a straight piece of muslin as was the previous Grandmother's Flower Garden Antique Quilt Top post.
I hope this gives you inspiration and encouragement to quilt these wonderful memories in fabric and design.
Quilt Happy, Sally
If you want some help loading and working with the whole quilt top and patterns check out this book for quick tips and lots of quick free motion designs.
I know what you mean. Once I installed the cup foot on my Innova, all I had to do was slip a piece of closely matching vintage fabric into the split seam/hole/tear -- no repairing prior to loading. My backlog of 30 antique tops are now quilted and waiting on binding and labels! Such a sense of accomplishment!!
ReplyDeleteOh, Allison, that is GREAT!!! Have you posted them anywhere? Such dedication to these wonderful wonderful quilts. 30 antique quilt tops that are ready to be loved. I am sure the labels will be fun to record the histories. You are my quilting hero, thanks for sharing, Sally
ReplyDeleteI tend to float my tops but have not done the same for the backing. Interesting idea! Love the quilt and I like the quilting designs you chose. Beautiful work!
ReplyDeletetie some selvage to each side of your table
Deletepull in to your centered loaded quilt top
mark each selvage where it meets the quilt top edges
every time you advance the quilt top re-measure and adjust so it
meets the edge of your top...that will keep it straight when
floating your tops
quilt happy! Sally